All CA practice menus
- Getting started
- Clients and onboarding
- Bookkeeping
- Bank reconciliation
- GST returns
- TDS
- Month-end and statements
- Your practice: calendar, fees and time
- The client app
The client app
For: Your clients; partners who set it up
Your clients get their own phone app at your ERP address followed by /client. Each client sees only their own business: filings, numbers from the books you keep, your fee invoices, and a place to send you documents. It installs from the browser; no app store is needed.
New here? Start with Getting started.
Step by step
1Give a client a login#
Create a user with the client's email and give it no ERP roles, so it is saved as a Website User. Then open the client under Customers and add that user under Portal Users. One business can have several logins (owner, accounts person). A Website User cannot open the ERP itself, only the client app.
2Install it#
The client opens the address on their phone and signs in. On Android: menu › Install app; on iPhone: Share › Add to Home Screen. It opens like any other app.
3Staff preview#
You and your accountants can open /client too, with your own login, and pick any client to see the app exactly as that client sees it. Use it to support a client or show it to a new one.
4Home#
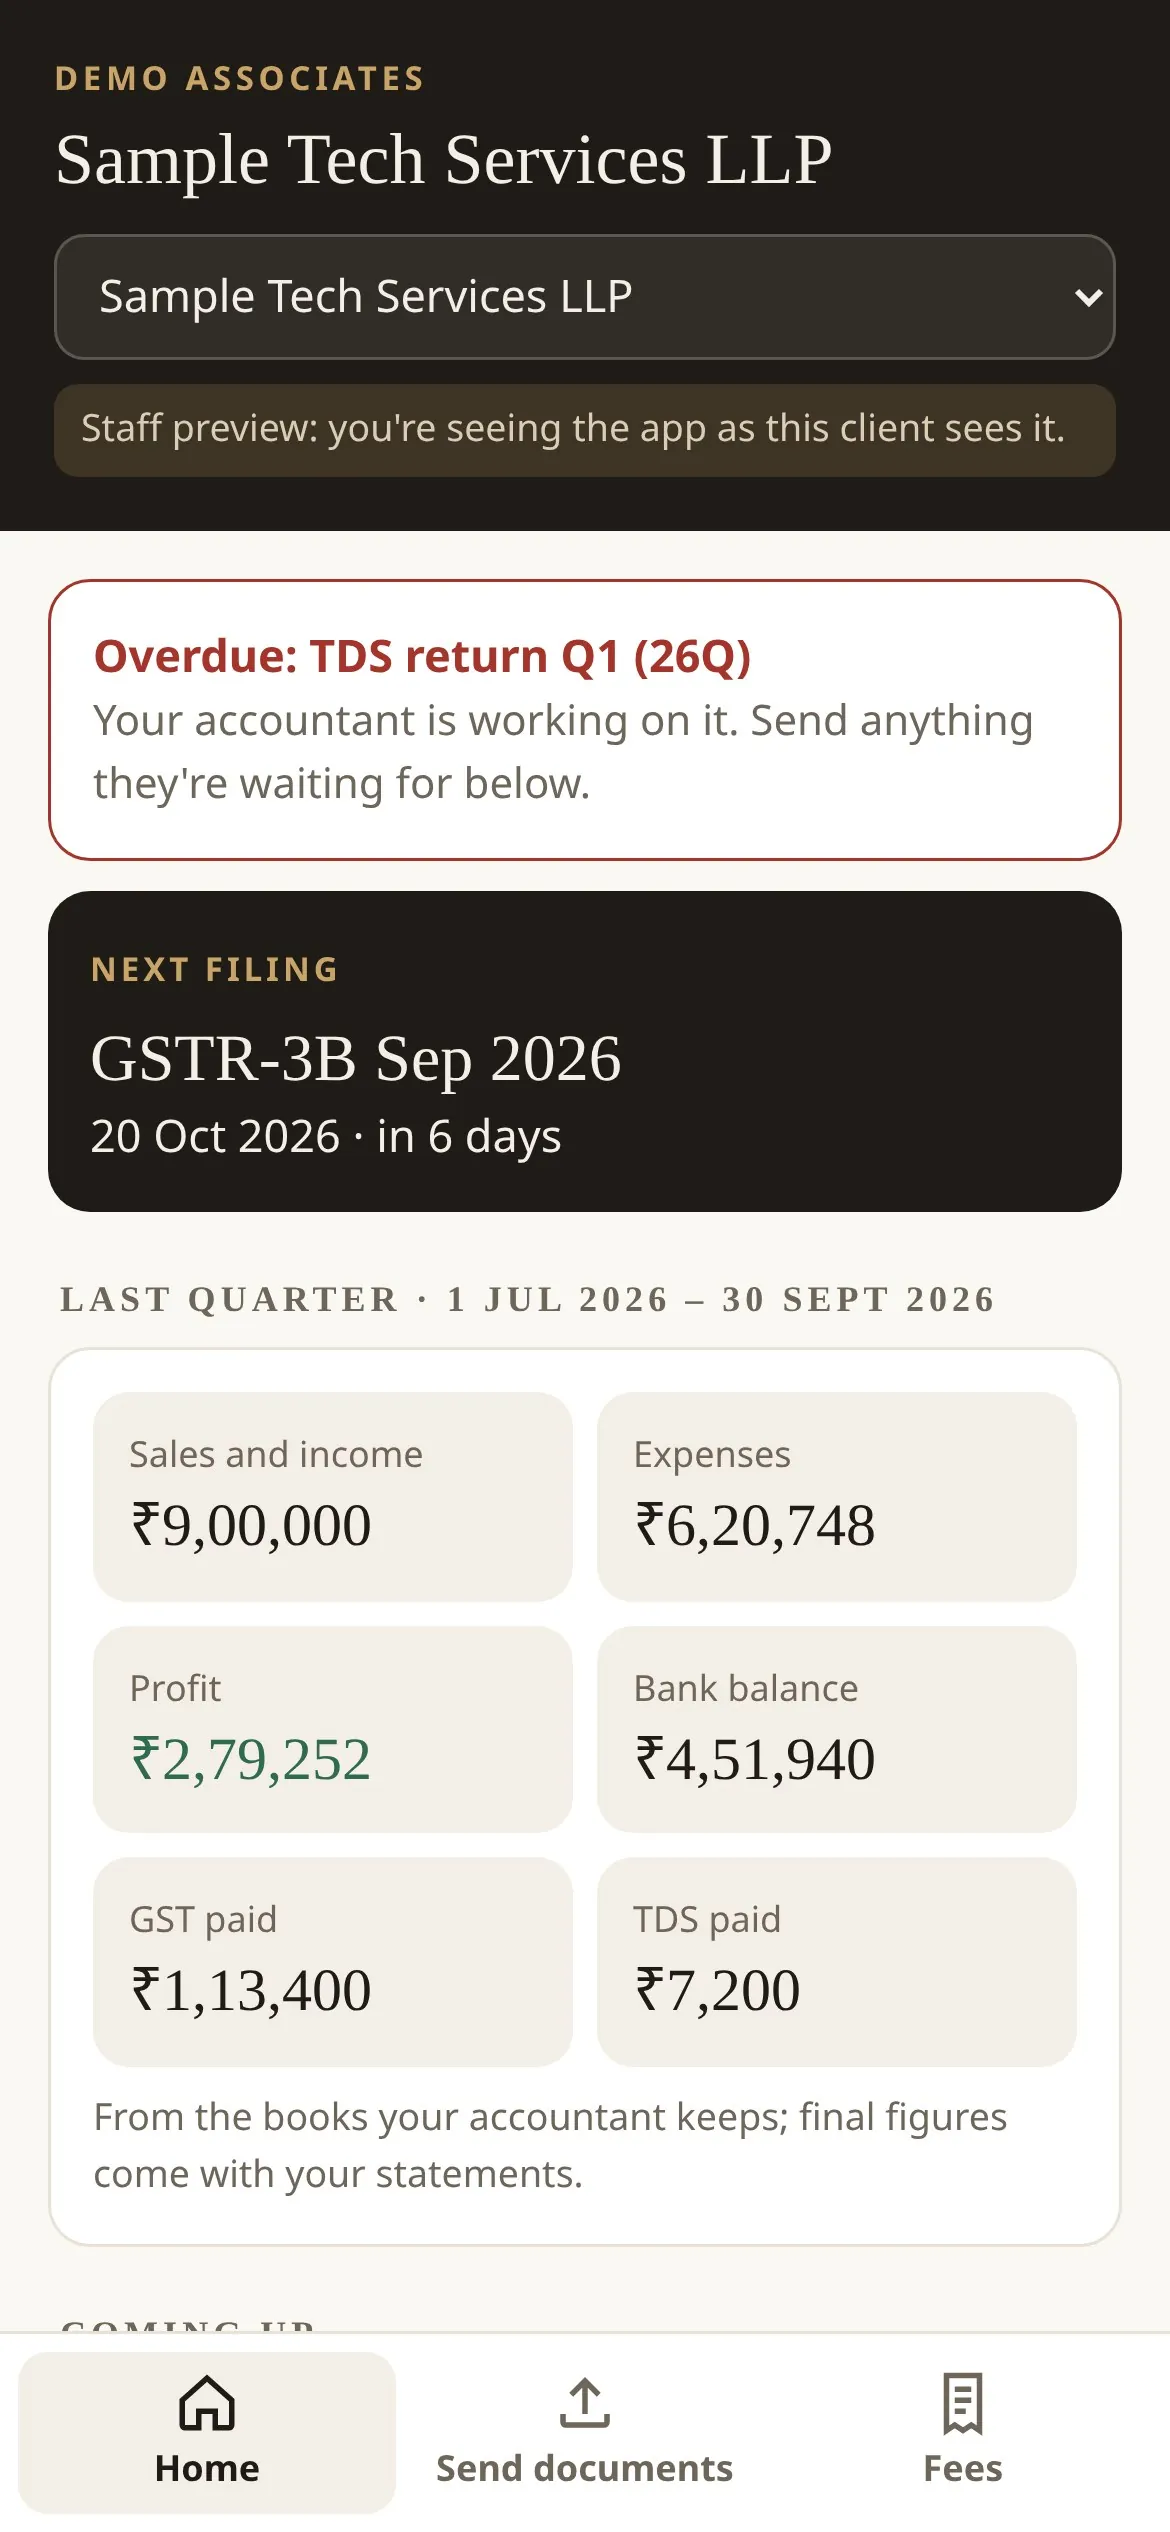
What is overdue, the next filing with its due date, and last quarter's income, expenses, profit, bank balance, GST and TDS paid, from the books you keep. Below: the year's filings, marked overdue, this week or upcoming, and those already filed.
5Fees#
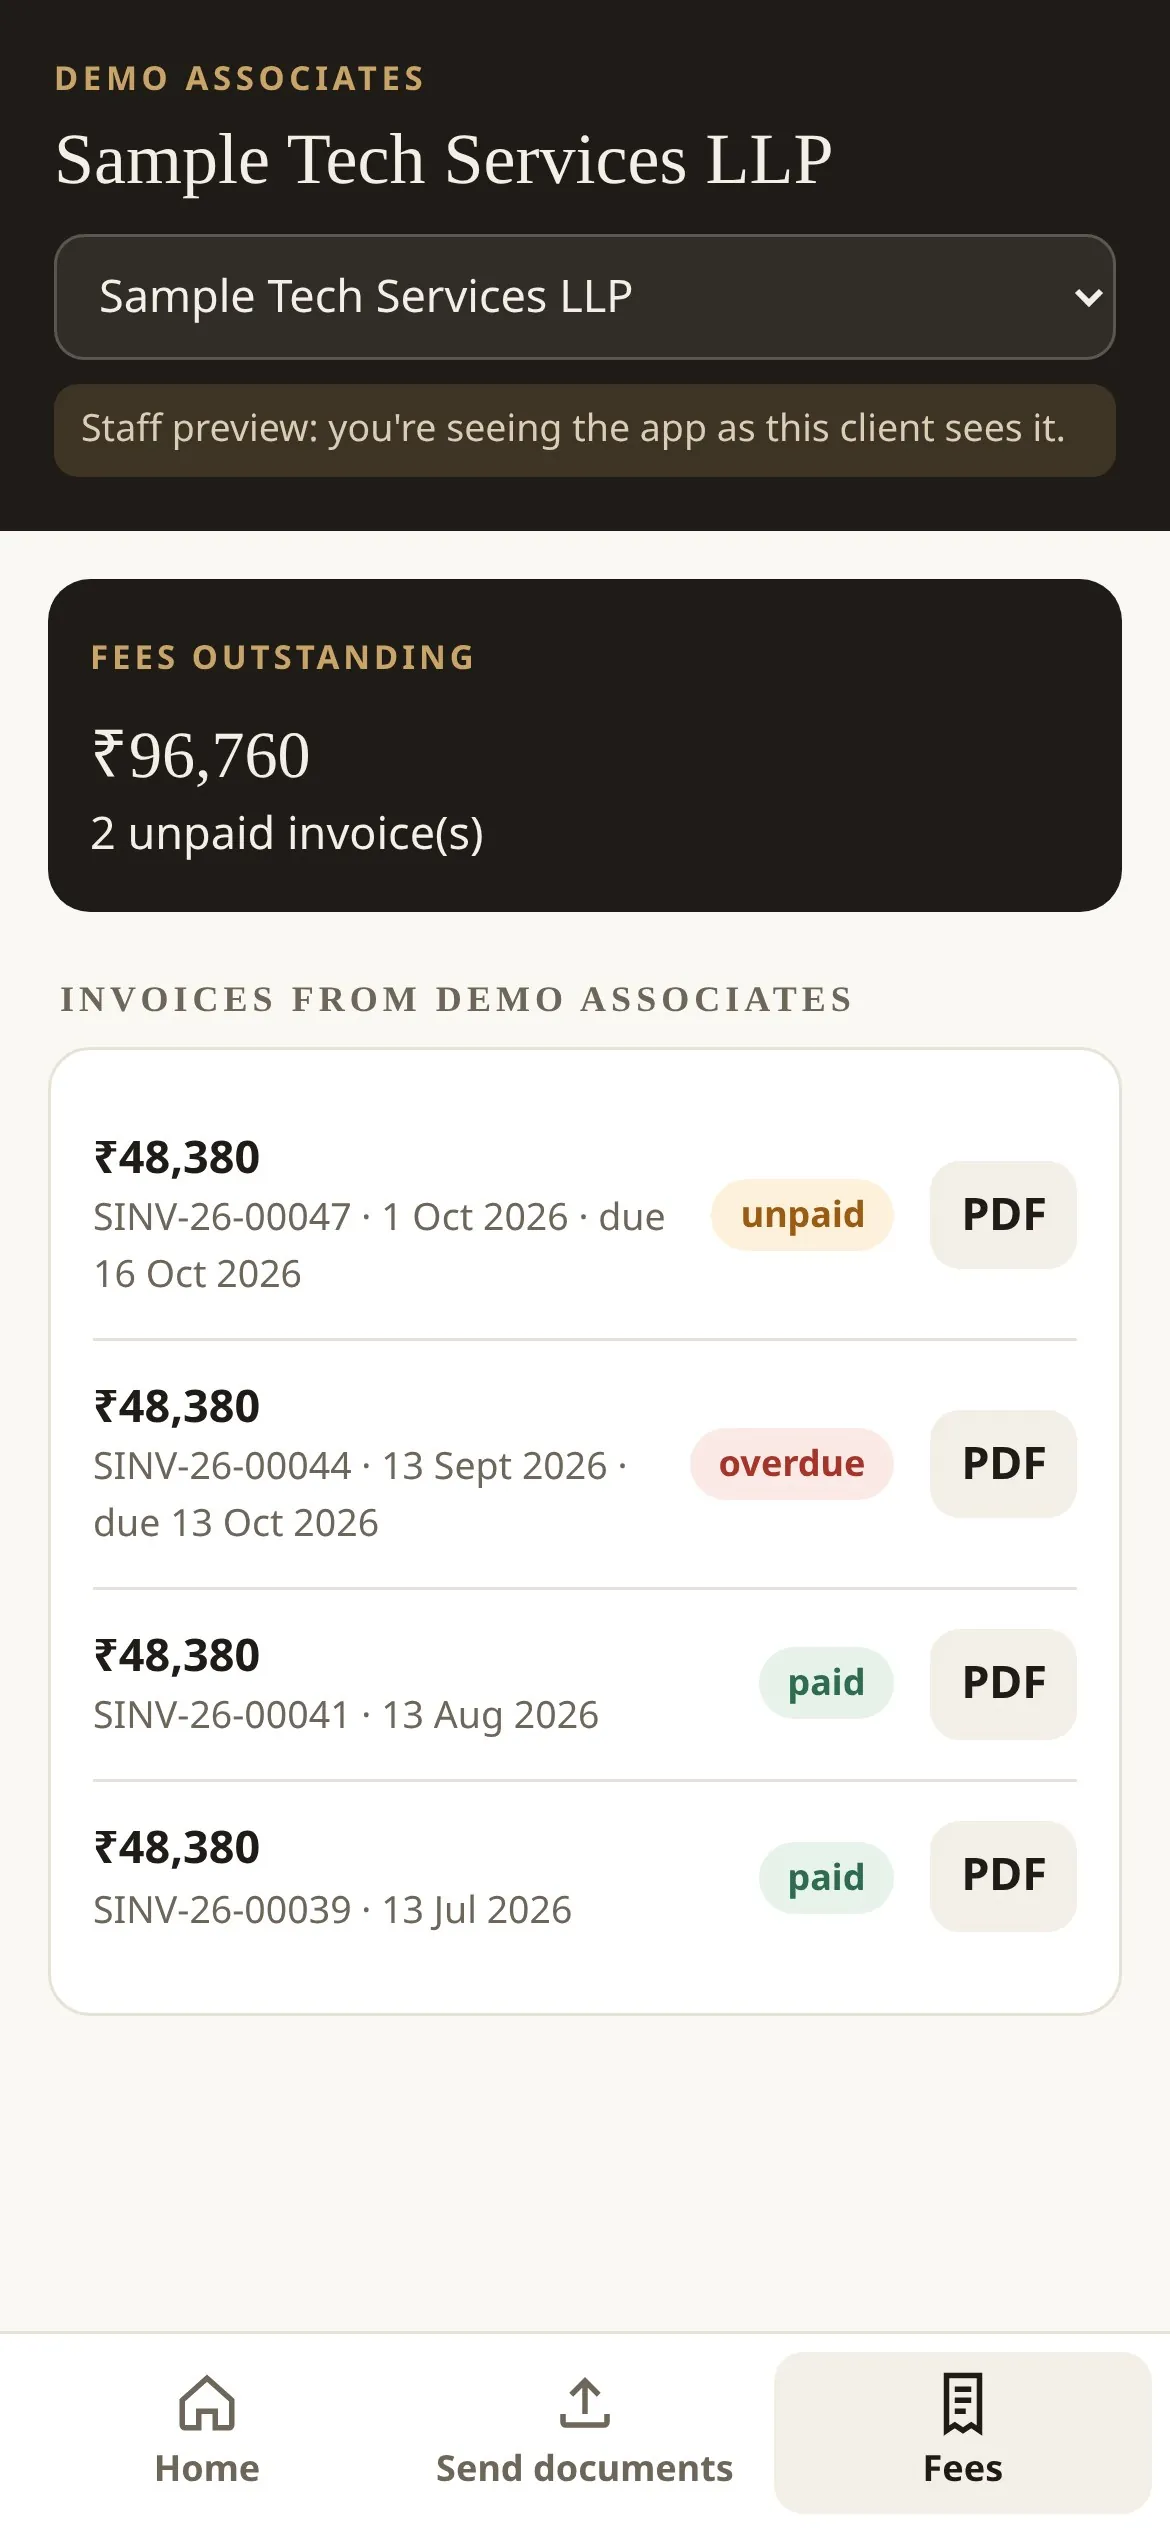
Your fee invoices to this client, paid or unpaid, each with its PDF. The total outstanding is at the top.
6Send documents#
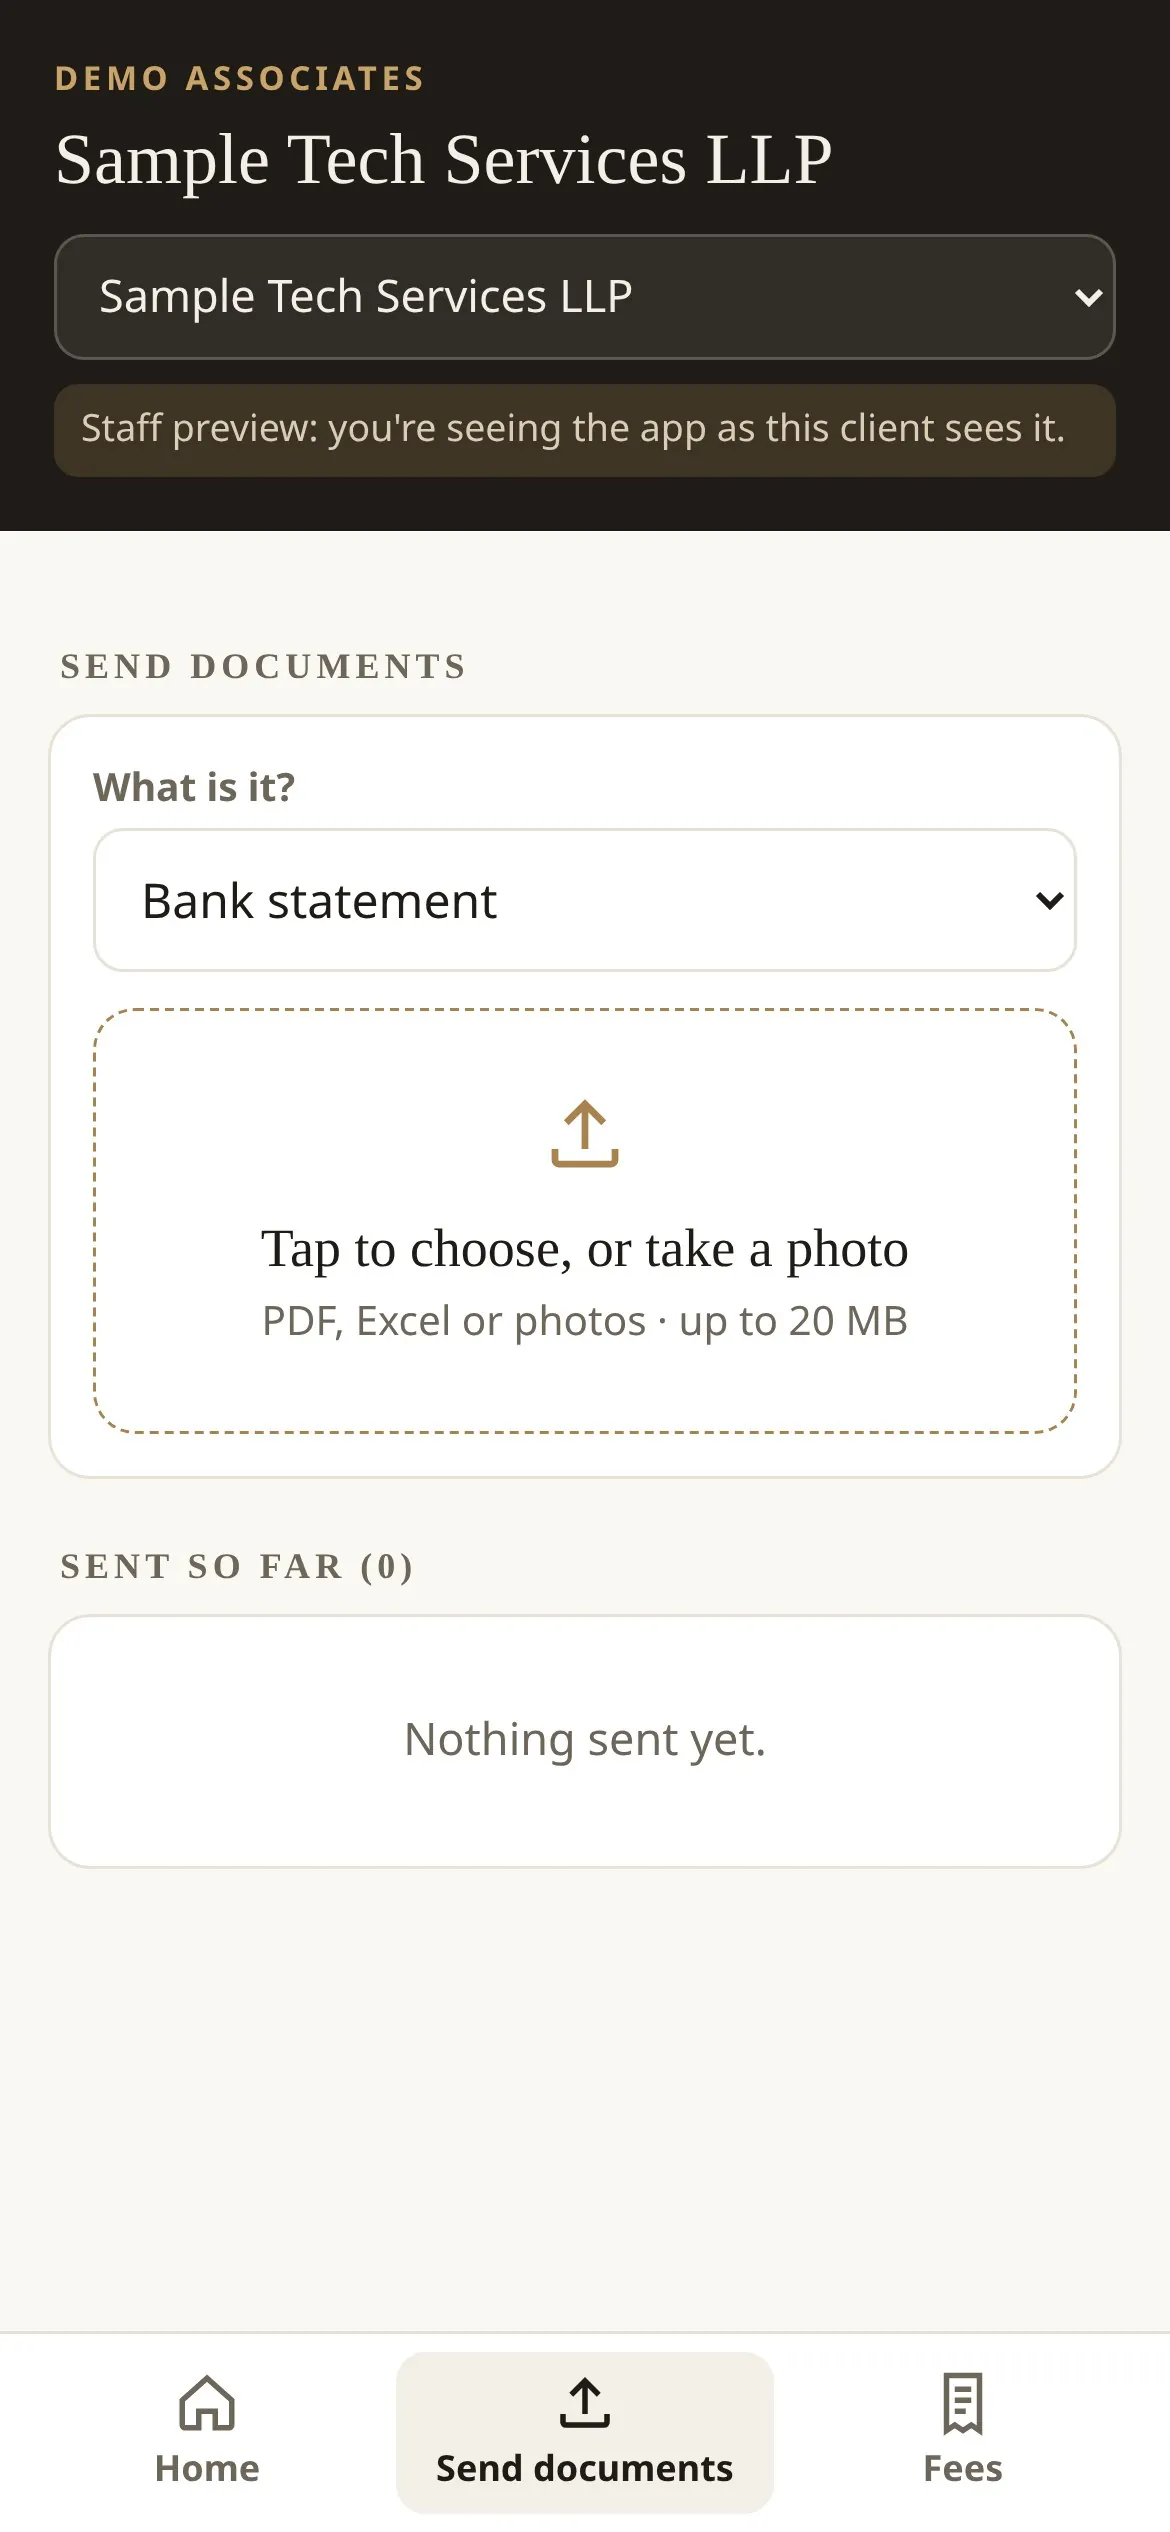
The client picks what it is (bank statement, sales invoices, purchase bills, expense bills, salary sheet, other) and chooses a file or takes a photo, up to 20 MB. It is saved privately on the client's compliance project, and a note appears there for your team.